每年Gartner发布的技术成熟度曲线(The Hype Cycle)都备受市场关注,也成为企业精准创新、重大投资决策的风向标。今年新兴技术成熟度曲线最亮眼的就是人工智能技术。基于数据,人们可以解决超乎想象的问题。不少朋友在问企业hands on深度学习的人工智能怎么做,我来给大家做一个关于编码细节程度的卷积神经网络、基于MNIST数据集的实验,带您一探究竟。
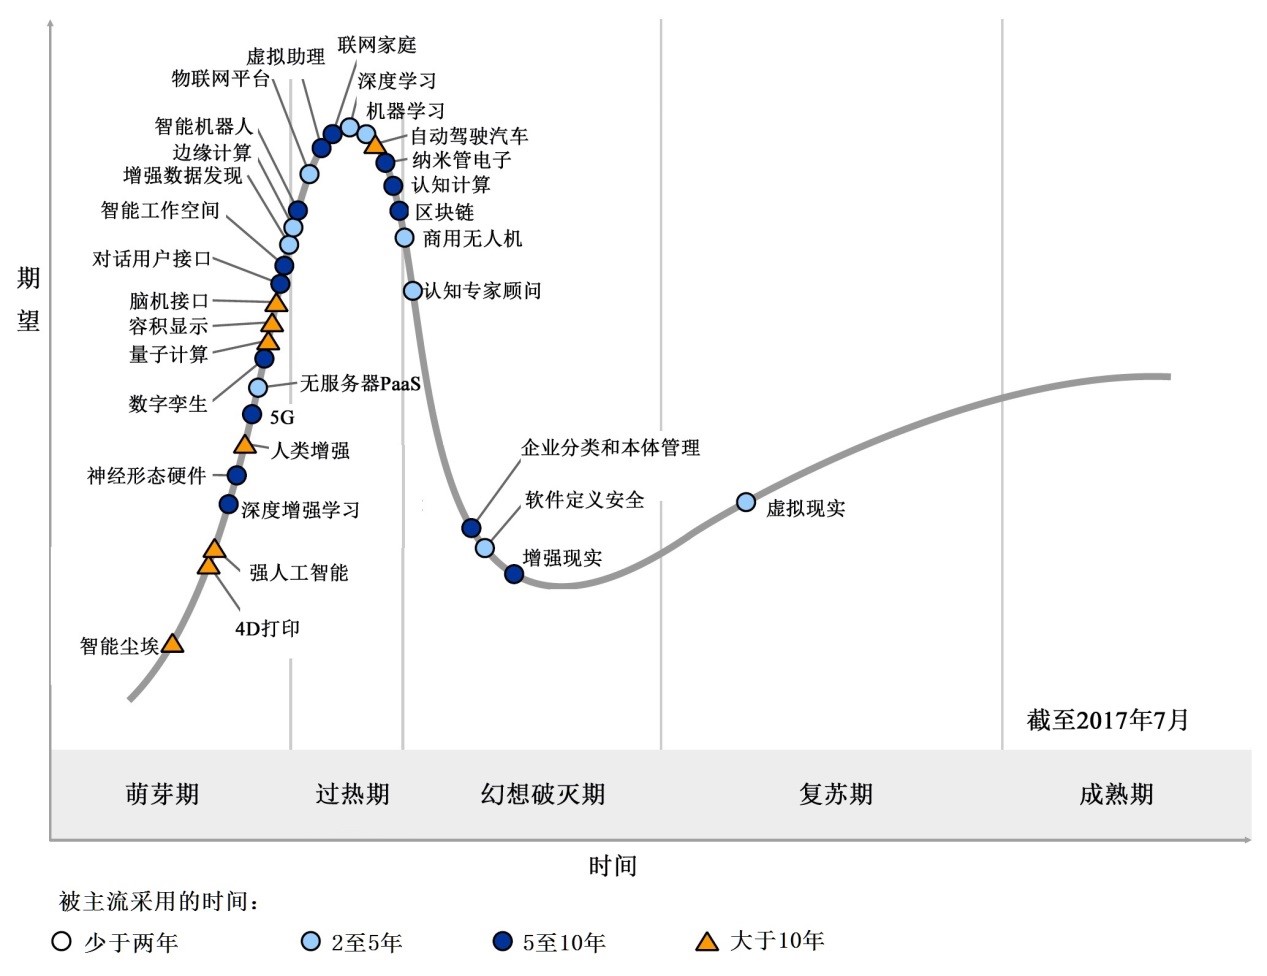
未来10年人工智能将成为最具颠覆性的技术,主要源于越来越强的计算能力、越来越海量的互联网和物联网数据以及深度学习理论的快速进步。
深度学习研究的热潮持续高涨,各种开源深度学习框架也层出不穷,其中包括Google的TensorFlow、Keras、Facebook的Caffe、Torch、Microsoft的CNTK、Amazon的MXNet、以及蒙特利尔大学的Theano等等。而现在几乎所有主流云平台都支持深度学习框架,使用框架创建神经网络就变成一件轻而易举的事情了。
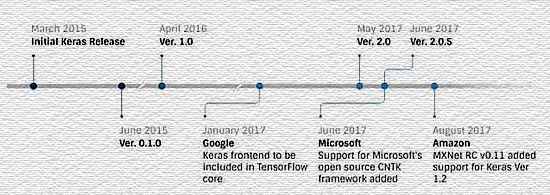
下面简单演示一下使用pyTorch创建一个卷积神经网络,使用经典的MNIST数据集进行训练和测试。
我们知道:创建一个神经网络主要有4个步骤:
- 定义神经网络的结构
- 定义损失函数
- 在会话中,将数据输入进构建的神经网络中,反复优化损失函数,直至得到最优解
- 将测试集丢入训练好的神经网络进行验证
PyTorch中定义卷积神经网络
class CNN(nn.Module):
    def __init__(self):
    super(CNN, self).__init__()
    self.conv1 = nn.Sequential( 			# input shape (1, 28, 28)
        nn.Conv2d(
            in_channels=1,  			# input height
            out_channels=16,			# n_filters
            kernel_size=5,  			# filter size
            stride=1,   				# filter movement/step
            padding=2,  				# if want same width and length of this image after con2d, padding=(kernel_size-1)/2 if stride=1
        ),  # output shape (16, 28, 28)
        nn.ReLU(),  					# activation
        nn.MaxPool2d(kernel_size=2),	# choose max value in 2x2 area, output shape (16, 14, 14)
    )
    self.conv2 = nn.Sequential( 			# input shape (1, 14, 14)
        nn.Conv2d(16, 32, 5, 1, 2), 		# output shape (32, 14, 14)
        nn.ReLU(),  					# activation
        nn.MaxPool2d(2),				# output shape (32, 7, 7)
    )
    self.out = nn.Linear(32 * 7 * 7, 10)  	# fully connected layer, output 10 classes

    def forward(self, x):
        x = self.conv1(x)
        x = self.conv2(x)
        x = x.view(x.size(0), -1)   		# flatten the output of conv2 to (batch_size, 32 * 7 * 7)
        output = self.out(x)
        return output, x				# return x for visualization
下面使用MNIST数据集训练网络。MNIST 数据集来自美国国家标准与技术研究所,National Institute of Standards and Technology (NIST)。训练集 (training set) 由来自 250 个不同人手写的数字构成,其中 50% 是高中学生,50% 来自人口普查局 (the Census Bureau) 的工作人员。
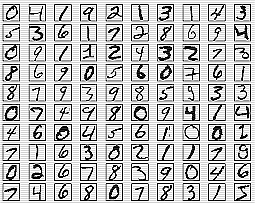
测试集(test set) 也是同样比例的手写数字数据。MNIST 数据集可在 http://yann.lecun.com/exdb/mnist/ 获取。
# Mnist digits dataset
if not(os.path.exists('./mnist/')) or not os.listdir('./mnist/'):
# not mnist dir or mnist is empyt dir
DOWNLOAD_MNIST = True

train_data = torchvision.datasets.MNIST(
    root='./mnist/',
    train=True, 									# this is training data
    transform=torchvision.transforms.ToTensor(),		# Converts a PIL.Image or numpy.ndarray to
                                                    # torch.FloatTensor of shape (C x H x W) and normalize in the range [0.0, 1.0]
    download=DOWNLOAD_MNIST,
)

# plot one example
print(train_data.train_data.size()) 					# (60000, 28, 28)
print(train_data.train_labels.size())   					# (60000)
plt.imshow(train_data.train_data[0].numpy(), cmap='gray')
plt.title('%i' % train_data.train_labels[0])
plt.show()

# Data Loader for easy mini-batch return in training, the image batch shape will be (50, 1, 28, 28)
train_loader = Data.DataLoader(dataset=train_data, batch_size=BATCH_SIZE, shuffle=True)

# convert test data into Variable, pick 2000 samples to speed up testing
test_data = torchvision.datasets.MNIST(root='./mnist/', train=False)
test_x = Variable(torch.unsqueeze(test_data.test_data, dim=1), volatile=True).type(torch.FloatTensor)[:2000]/255.   # shape from (2000, 28, 28) to (2000, 1, 28, 28), value in range(0,1)
test_y = test_data.test_labels[:2000]
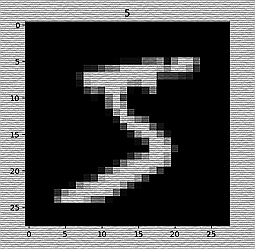
运行程序,我们画出第一个数字是5。
一些模块的引入语句如下,然后开始训练网络。
import os

# third-party library
import torch
import torch.nn as nn
from torch.autograd import Variable
import torch.utils.data as Data
import torchvision
import matplotlib.pyplot as plt

# torch.manual_seed(1)# reproducible

# Hyper Parameters
EPOCH = 1   # train the training data n times, to save time, we just train 1 epoch
BATCH_SIZE = 50
LR = 0.001  # learning rate
DOWNLOAD_MNIST = False
下面是测试网络部分代码:
cnn = CNN()
print(cnn)  # net architecture

optimizer = torch.optim.Adam(cnn.parameters(), lr=LR)   # optimize all cnn parameters
loss_func = nn.CrossEntropyLoss()   # the target label is not one-hotted

# following function (plot_with_labels) is for visualization, can be ignored if not interested
from matplotlib import cm
try: from sklearn.manifold import TSNE; HAS_SK = True
except: HAS_SK = False; print('Please install sklearn for layer visualization')
def plot_with_labels(lowDWeights, labels):
    plt.cla()
    X, Y = lowDWeights[:, 0], lowDWeights[:, 1]
    for x, y, s in zip(X, Y, labels):
        c = cm.rainbow(int(255 * s / 9)); plt.text(x, y, s, backgroundcolor=c, fontsize=9)
    plt.xlim(X.min(), X.max()); plt.ylim(Y.min(), Y.max()); plt.title('Visualize last layer'); plt.show(); plt.pause(0.01)

plt.ion()
# training and testing
    for epoch in range(EPOCH):
    for step, (x, y) in enumerate(train_loader):   # gives batch data, normalize x when iterate train_loader
    b_x = Variable(x)   # batch x
    b_y = Variable(y)   # batch y

    output = cnn(b_x)[0]   # cnn output
    loss = loss_func(output, b_y)   # cross entropy loss
    optimizer.zero_grad()   # clear gradients for this training step
    loss.backward() # backpropagation, compute gradients
    optimizer.step()# apply gradients

    if step % 50 == 0:
        test_output, last_layer = cnn(test_x)
        pred_y = torch.max(test_output, 1)[1].data.squeeze()
        accuracy = sum(pred_y == test_y) / float(test_y.size(0))
        print('Epoch: ', epoch, '| train loss: %.4f' % loss.data[0], '| test accuracy: %.2f' % accuracy)
        if HAS_SK:
            # Visualization of trained flatten layer (T-SNE)
            tsne = TSNE(perplexity=30, n_components=2, init='pca', n_iter=5000)
            plot_only = 500
            low_dim_embs = tsne.fit_transform(last_layer.data.numpy()[:plot_only, :])
            labels = test_y.numpy()[:plot_only]
            plot_with_labels(low_dim_embs, labels)
plt.ioff()

# print 10 predictions from test data
test_output, _ = cnn(test_x[:10])
pred_y = torch.max(test_output, 1)[1].data.numpy().squeeze()
print(pred_y, 'prediction number')
print(test_y[:10].numpy(), 'real number')
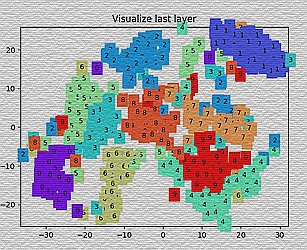
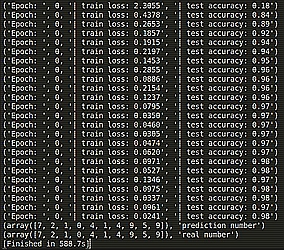
运行结果:
话说哪位老铁有多余的有CUDA功能的Geforce显卡,当初入了A家,现在想自己在深度学习领域hands-on一下,有点欲哭无泪啊……